Integration purpose: The goal of this integration is to simplify the process of transferring and managing presentations from PowerPoint to Pitch Avatar.
Features:
Export presentations to Pitch Avatar: Enables users to transfer their PowerPoint presentations to Pitch Avatar for further editing and sharing.
AI content generation: Provides the ability to automatically generate text, voice scripts, and avatars to improve presentations.
Personalized links: Users can customize links to their presentations, making them more unique and tailored to their audience.
Preview and editing: Allows users to preview and edit their presentation after importing it into Pitch Avatar, including adding text, web links, and other content.
Audience access: Enables access to the presentation via a link or QR code making it easier to share with the audience.
Steps to install Pitch Avatar integration with PowerPoint
- Open PowerPoint:
Launch PowerPoint on your device (available for both desktop and web versions). - Access the Add-ins Store:
In either the web or desktop version, click the File tab and select Get Add-ins.
3. Search for the add-in: type Pitch Avatar in the search bar and click Search.
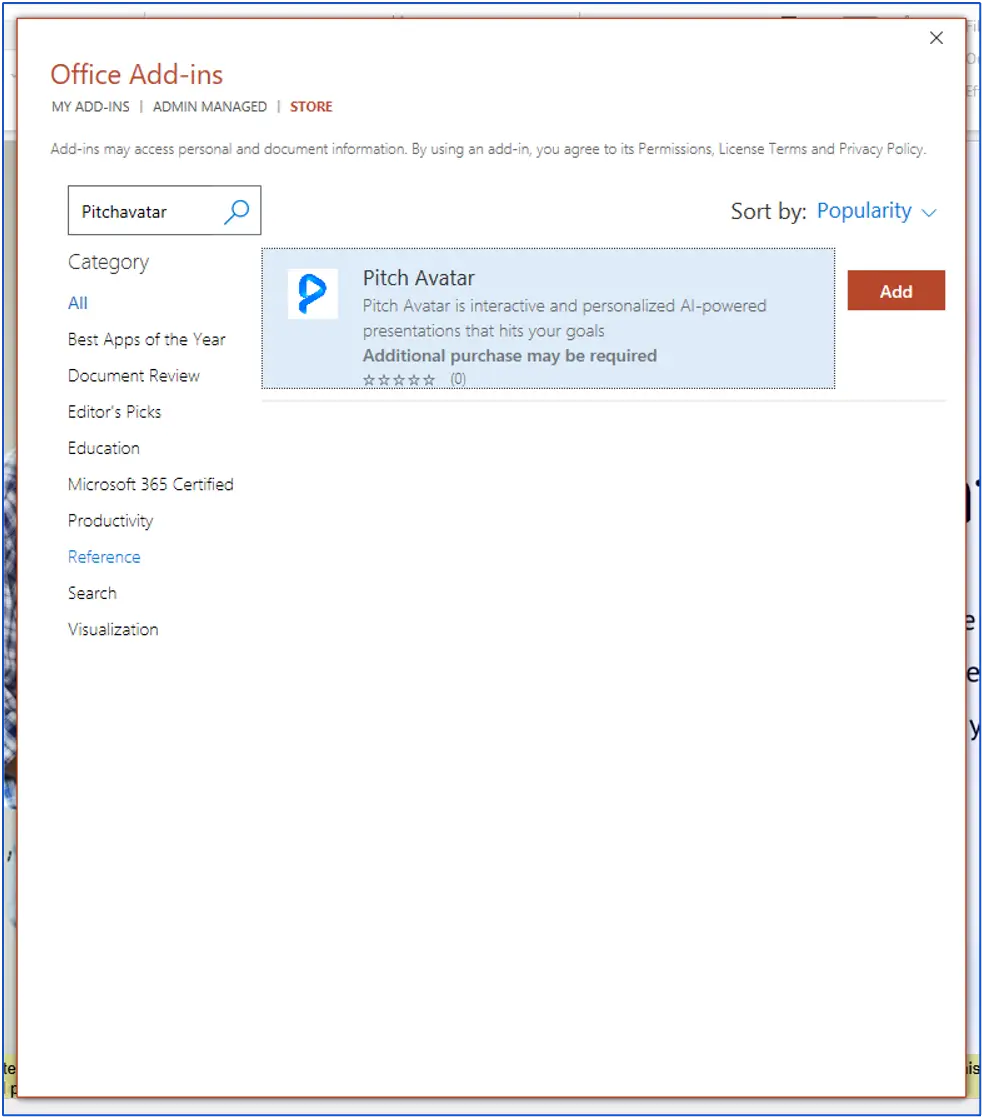
4. Install add-in: Find Pitch Avatar integration in the search results and click Add or Install.
5. Confirm Installation: Follow the on-screen instructions to complete installation.

Login
- Open PowerPoint: Launch PowerPoint.
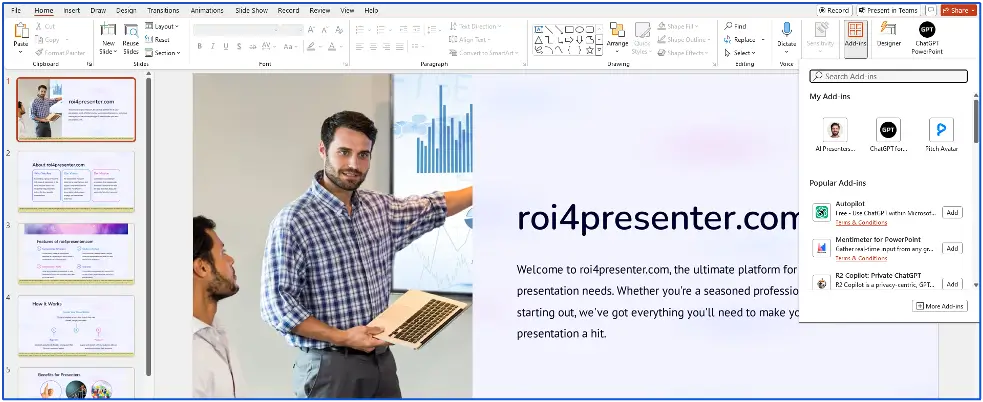
- Access Pitch Avatar: After installing the add-in, locate the Pitch Avatar icon on the Add-ins toolbar and click on it.
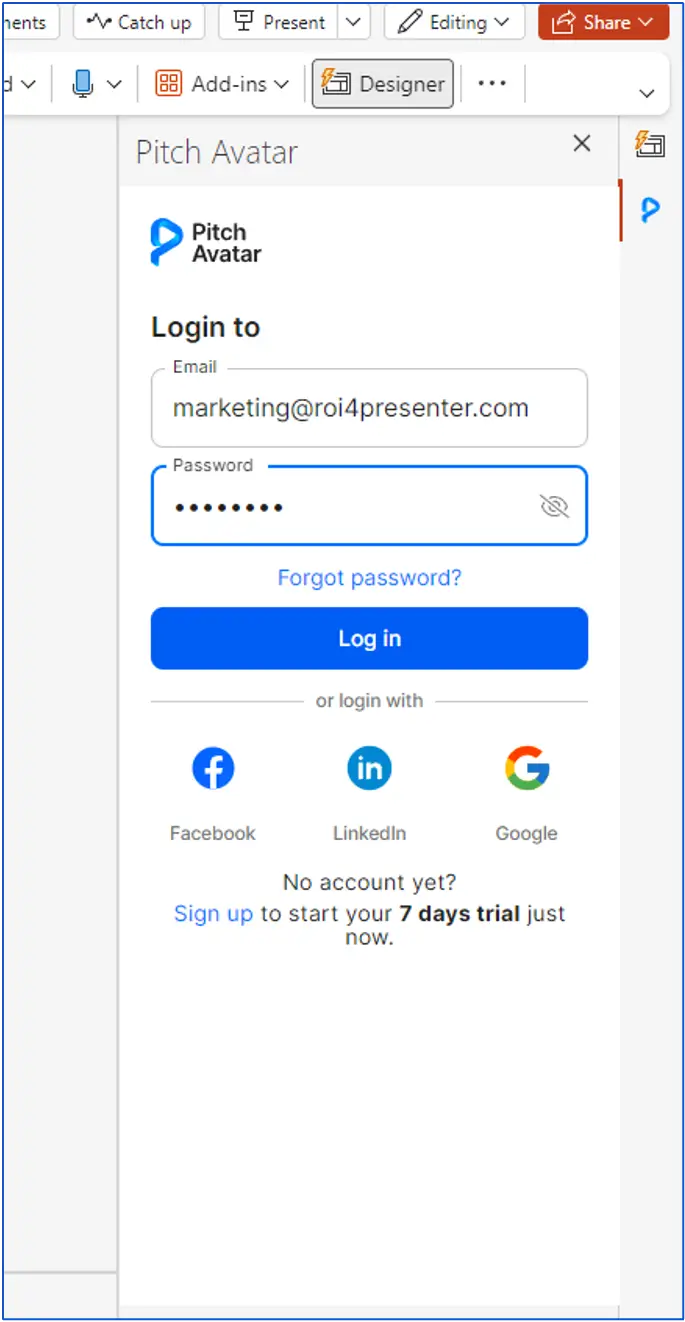
Log into your account:
- If you already have an account, enter your email and password, then click Log in.
- If you registered via social media, select the appropriate icon and follow the instructions to log in.
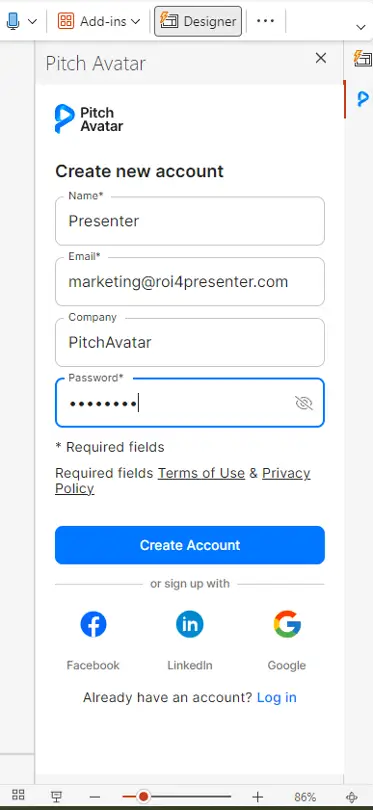
Registration
- Open PowerPoint: Launch PowerPoint.
- Access Pitch Avatar: Click the Pitch Avatar icon on the Add-ins toolbar.
- Fill out the registration form:
- Enter your name, email, company, and password.
- Click Register.
- Check your email and confirm your registration by following the link (for manual registration).
- Register via social media:
- Click the icon of the social network you wish to use.
- Complete the registration by following the on-screen instructions.
Export and working within the platform
Exporting presentation
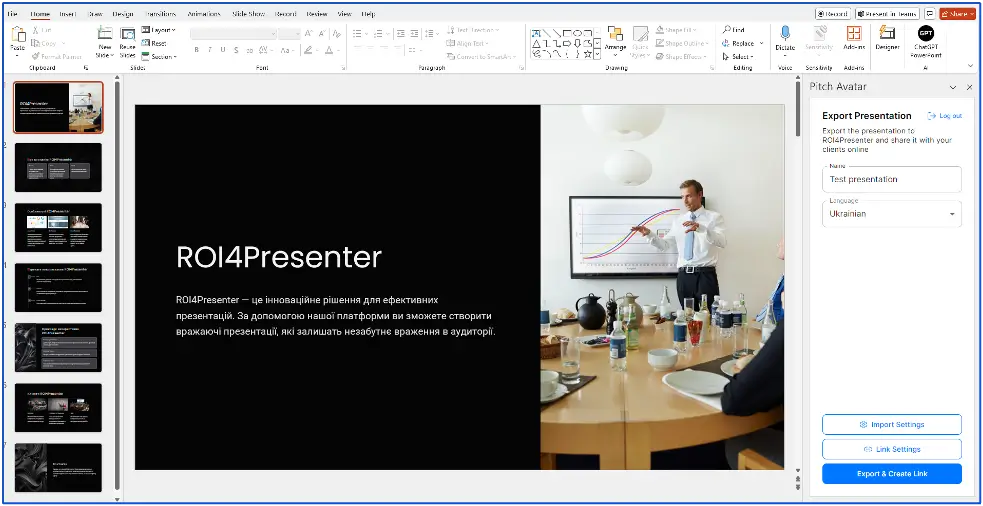
- Open your presentation: Launch PowerPoint and open the presentation you want to export.
- Start Pitch Avatar: Click the Pitch Avatar icon on the toolbar and log in.
- Personalization settings in import and link settings:
- Adjust the presentation settings, such as text, web links, files as well as voice and avatar generation options.
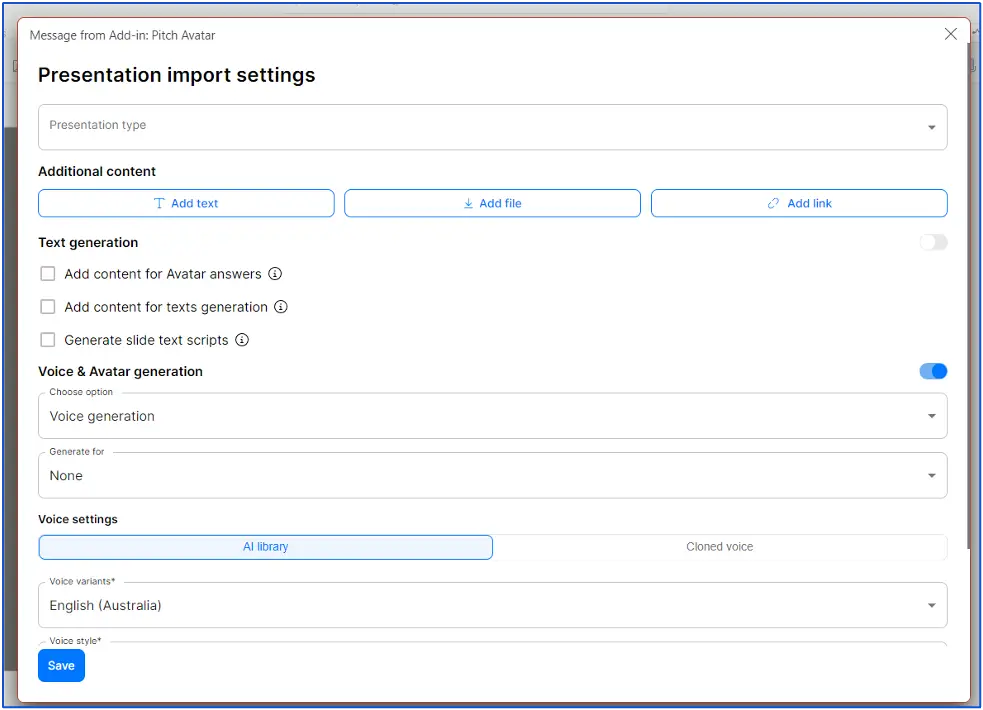
- Customize personalization settings:
Customize each link to match your audience’s needs.

4. Export presentation:
- Enter the presentation name (the current file name is used by default).
- Select the presentation language and other options, such as AI content generation.
- Click Export & Create link.
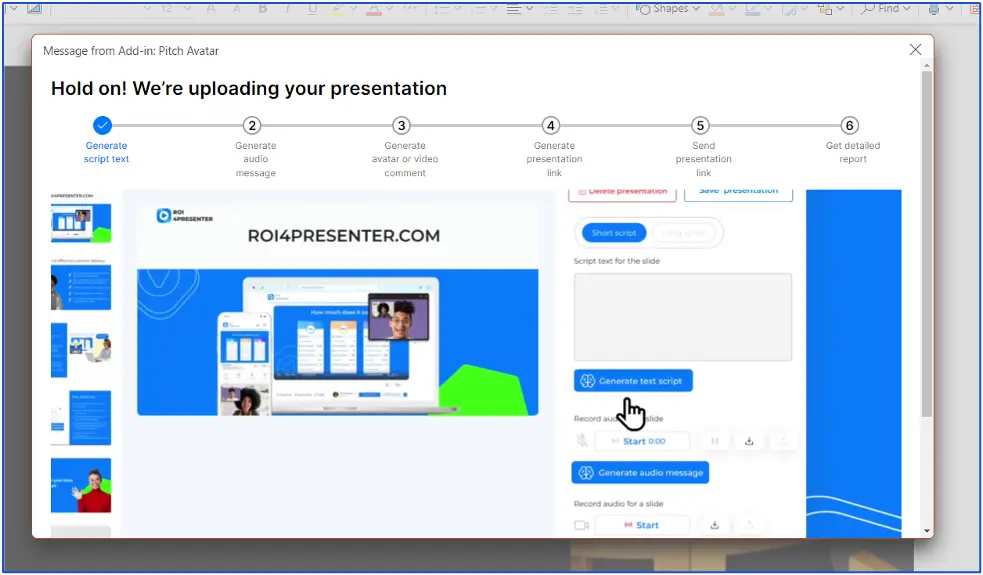
5. Pop-up window:
During the export process, a pop-up window will appear with a video about the service and a progress indicator. You can close this window without interrupting the export.
Working with the exported presentation
Accessing links
- After the export is complete, a window will appear with:
- Web links for editing the presentation in the service
- A link to share with your audience
- A QR code for quick access to the link
Click the appropriate links to edit or view the presentation.

2. Opening in the Pitch Avatar CMS:
To edit and manage the presentation, click the Open in Pitch Avatar link to launch it in the Web App.
3. Viewing presentation:
Use the provided link or QR code to share it with your audience or review the presentation yourself.